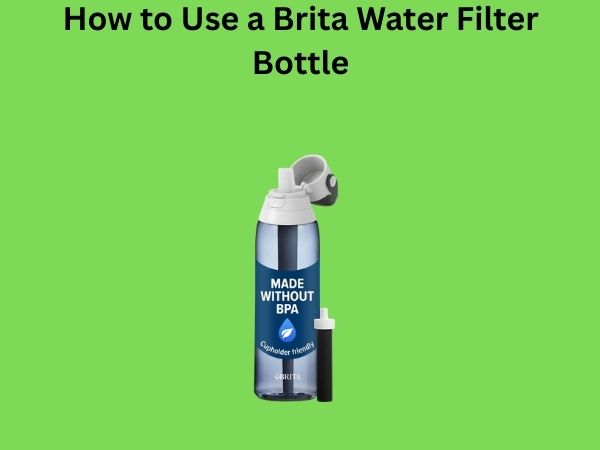
How to Use a Brita Water Filter Bottle: A Complete Step-by-Step Guide
If you’ve just picked up a Brita water filter bottle and you’re staring at it wondering where to start, you’re not alone. Many people find themselves puzzled by the setup process, but I’m here to tell you that it’s actually simpler than you might think. In this guide, I’ll walk you through every single step of using your Brita bottle, from the initial unboxing to enjoying your first filtered drink.
Understanding the Components of Your Brita Water Filter Bottle
Before you can use your Brita bottle effectively, you need to know what you’re working with. Think of it like learning to drive a car—you wouldn’t just jump in and start the engine without understanding the basic controls. Your Brita water filter bottle consists of several key parts that all work together to deliver clean, filtered water.
The Main Bottle Body
The bottle body is the large plastic container that holds your water. It’s typically made from durable, BPA-free plastic and comes in various colors and sizes depending on which model you’ve purchased. This is where all your water sits while it’s being filtered. The body usually has measurement markings on the side so you can see how much water you’re drinking throughout the day.
The Filter Cartridge
This is the heart of your Brita system. The filter cartridge is a small cylindrical component filled with activated carbon and ion exchange resin. These materials work together to remove chlorine, mercury, copper, and other contaminants from your tap water. It’s essentially doing the heavy lifting of the entire operation, so understanding its importance is crucial.
The Filter Holder and Lid
The filter holder is the chamber that sits at the top of your bottle where the filter cartridge goes. The lid seals the entire bottle closed, keeping your water fresh and preventing any spillage. Some Brita models have a flip-top lid that doubles as a drinking cap, making it super convenient for on-the-go hydration.
The Base and Seal Rings
At the bottom of the filter holder, you’ll find seal rings that create a watertight connection between the filter and the bottle body. These might seem like tiny, insignificant pieces, but they’re absolutely vital for preventing leaks. Without proper sealing, your water won’t filter correctly, and you’ll end up with a mess on your hands.
Step One: Preparing Your Filter for First Use
Here’s something many people skip, and I’ve got to tell you—it’s actually important. Before you use your brand new Brita filter for the first time, you need to prep it. This process is called “soaking” your filter, and it takes just a few minutes but makes a big difference in performance.
Why You Need to Soak Your Filter
When your filter is manufactured, it’s essentially dormant. The activated carbon inside hasn’t been activated to its full potential yet. By soaking it in cold water, you’re essentially “waking it up” and preparing it to do its job effectively. Think of it like stretching before a workout—your filter needs that preparation to perform at its best.
How to Soak Your Filter Correctly
Here’s the simple process: Remove your filter from its packaging and hold it under cold running water for about 15 seconds. Let the water flow over the top and sides of the filter. You’ll notice the water flowing out the bottom—that’s exactly what you want to see. After that initial rinse, submerge the filter completely in a glass of cold water for about five minutes. You can do other things while waiting—make a cup of tea, check your email, whatever works for you.
Step Two: Assembling Your Brita Water Filter Bottle
Now that your filter is prepped and ready, it’s time to put everything together. This is where the magic happens, and I promise it’s straightforward once you know what you’re doing.
Inserting the Filter Into the Holder
Take your pre-soaked filter and look at its design. You’ll notice it’s shaped to fit into the filter holder chamber. With the threaded end facing down, insert the filter into the holder. It should slide in smoothly—if you’re encountering resistance, double-check that you’re inserting it the correct way. The filter should sit snugly but not require excessive force.
Securing the Lid and Filter Chamber
Once your filter is in place, you’ll need to secure everything. Depending on your Brita model, this might involve twisting the lid onto the filter chamber or clicking it into place. Check your instruction manual for your specific model, as different Brita bottles have slightly different mechanisms. What’s universal is that everything should feel secure and stable. If something feels loose or wobbly, you probably haven’t seated it properly.
Checking the Seal
Before you fill it with water, make sure those seal rings I mentioned earlier are properly positioned. They should be sitting in their grooves with no visible gaps. A good seal is what prevents water from bypassing your filter entirely. If you skip this step, you’re basically pouring unfiltered water directly into your bottle, which defeats the entire purpose.
Step Three: Filling Your Bottle for the First Time
Alright, you’ve got your bottle assembled. Now comes the satisfying part—actually filling it with water. But hold on, there’s a specific process here too.
The Initial Fill and Drain Method
Here’s what you’re going to do: Fill your bottle with tap water and let it run through the filter into your bottle body below. Then, without drinking this water, pour it out. Yes, I know it seems wasteful, but this first flush removes any residual carbon dust from the manufacturing process. Fill it again and do another drain. This typically takes just five minutes total and ensures your water is clean from the start.
Filling With Tap Water
After those initial flushes, you can now start using your bottle for actual drinking. Fill the upper filter chamber with cold tap water. You don’t need to fill it all the way to the brim—just add enough so that water can flow down through the filter. Watch as the water slowly filters down into the main bottle chamber. This is where the patience part comes in. The filtering process takes a few minutes depending on how much water you’re filtering.
Step Four: Understanding the Filtering Process
It’s helpful to understand what’s actually happening while your water sits in that filter chamber. Knowledge is power, and understanding your equipment makes you better at using it.
How the Activated Carbon Works
The activated carbon in your filter has a porous structure that looks almost like a tiny sponge under a microscope. As water passes through, contaminants stick to the surface of the carbon through a process called adsorption. Chlorine molecules, for instance, get trapped in those tiny pores and never make it into your drinking water. It’s nature’s way of filtering, enhanced through science.
The Role of Ion Exchange Resin
Alongside the activated carbon, your filter contains ion exchange resin. This material targets heavier metals and minerals that the carbon alone might miss. It works by swapping ions in the water with ions in the resin, essentially trading bad stuff for harmless materials. Together, these two components create a comprehensive filtration system that tackles multiple types of contaminants.
Step Five: Daily Use and Best Practices
Now that you know how to set everything up, let’s talk about using your bottle day to day. There are certain habits and practices that’ll keep your Brita bottle working optimally for as long as possible.
Refilling Your Filter Chamber Regularly
Once you’ve got filtered water in your main bottle, you can continue adding water to the filter chamber as you drink from the main chamber. It’s a continuous cycle. Some people prefer to fill it all at once and let it filter overnight, while others like the gradual approach. Both work fine—it’s really about your personal preference and how much water you drink daily.
Keeping Your Bottle Clean
You should wash your Brita bottle regularly, just like you would any other container you drink from. The main bottle body can go in the dishwasher (top rack typically), and the filter holder and lid can usually be hand-washed. Never submerge the actual filter cartridge in water for cleaning—just rinse it gently under cool running water if needed. Regular cleaning prevents bacterial growth and keeps your water tasting fresh.
Storage and Placement
Where you keep your Brita bottle matters. Store it in a cool place away from direct sunlight. Heat and light can degrade the filter’s effectiveness over time. Your refrigerator is actually an ideal storage spot, especially if you prefer chilled water. If you keep it on the counter, make sure it’s away from your stove or other heat sources.
Step Six: Filter Maintenance and Care
Your filter is doing the work, so it deserves some care and attention in return. Think of it like maintaining a car—regular upkeep extends its lifespan.
Checking Filter Performance
As you use your Brita bottle, you might notice that water filters more slowly over time. This is completely normal. As the filter collects contaminants, it becomes slightly more resistant to water flow. This slowdown is actually a sign that your filter is working and capturing the bad stuff. However, if water stops filtering altogether or becomes extremely slow, it might be time for a replacement.
The Filter Indicator Light
Many newer Brita bottles come with a built-in electronic filter indicator. This handy feature monitors your water usage and filter life, alerting you when it’s time to replace the cartridge. It typically takes about two to three months for a filter to become saturated, though this varies based on your tap water quality and how much water you filter daily. If your bottle doesn’t have an electronic indicator, you can keep track manually by marking the date on your calendar when you install a new filter.
Step Seven: Knowing When to Replace Your Filter
Eventually, every filter reaches the end of its life. Recognizing these signs is important for maintaining water quality.
Signs Your Filter Needs Replacing
- Water flows very slowly or barely at all
- Your water starts tasting like chlorine or metallic
- You’ve reached the three-month usage mark
- The electronic indicator tells you to replace it
- Visible particles or discoloration appears in your filtered water
How to Replace Your Filter
Replacing your filter is just as simple as installing the first one. Empty your bottle completely, twist or unclick the old filter from the holder, and insert a new pre-soaked filter using the same steps we covered earlier. Do those initial flushes again, and you’re back in business. The entire process takes maybe five minutes, and suddenly your bottle is performing like brand new.
Step Eight: Troubleshooting Common Issues
Even with everything you’ve learned, you might encounter some hiccups along the way. Don’t worry—most issues have simple solutions.
Water Is Leaking From Your Bottle
If you’re experiencing leaks, the culprit is usually improper sealing. Check that your seal rings are properly positioned and that the filter holder is screwed on or clicked in securely. Make sure the seal rings aren’t cracked or damaged. If they are, you might need replacement parts, which Brita sells separately. Sometimes, simply removing everything and reassembling with extra care solves the problem.
Water Tastes Off or Strange
If your filtered water doesn’t taste right, there could be a few reasons. First, confirm you did those initial flushes properly. Sometimes residual carbon dust affects taste. If that’s not it, your filter might be due for replacement. Water quality also varies by location—if you’ve recently moved or your tap water quality has changed, your filter might need time to adjust. Giving it a few more filling cycles sometimes helps.
Filter Is Extremely Slow From Day One
If your brand new filter is barely filtering water, you might not have soaked it properly. Try removing it and submerging it in water for longer—give it a good 10-15 minutes. Sometimes filters benefit from a longer soak time. Also check that you’re not over-tightening the filter into the holder, which can restrict water flow.
Step Nine: Maximizing Your Brita Bottle’s Lifespan
Want to get the absolute most out of your investment? Here are some pro tips I’ve learned over the years.
Use Filtered Water Wisely
Brita filters work great for drinking water, but they’re also excellent for cooking. Using filtered water for coffee, tea, or cooking ensures better-tasting results across the board. However, remember that your filter has a capacity limit. If you’re using a lot of water, you might be replacing filters more frequently, so budget accordingly.
Buy Filters in Bulk
Replacement filters are cheaper when you buy them in packs. Plus, you’ll always have a fresh filter ready when your current one dies. There’s nothing worse than discovering your filter needs replacing right when you need a cold drink. Having backups eliminates that frustration.
Conclusion
Using a Brita water filter bottle is genuinely straightforward once you understand the basics. From that initial soaking of your filter to recognizing when it needs replacement, every step serves a purpose. Your Brita bottle transforms ordinary tap water into clean, great-tasting drinking water, and honestly, it’s one of those simple tools that makes daily life better. By following the steps outlined in this guide—assembling correctly, maintaining regularly, and replacing filters when needed—you’ll get consistent, reliable performance from your bottle for years to come. Remember, the key is understanding not just what to do, but why you’re doing it. That knowledge transforms you from someone just going through the motions into someone who genuinely uses their equipment to its full potential. Now go ahead, fill that bottle, and enjoy some genuinely great-tasting water.
Frequently Asked Questions
How long does it take for a Brita filter to filter water?
The filtering time depends on several factors, including how full your filter chamber is and how old your filter is. Generally, expect about five to ten minutes for water to completely filter through. Fresh, new filters work faster than older ones, which slow down as they accumulate contaminants. If filtering is taking significantly longer than this, your filter probably needs replacement soon.
Can you drink water straight from a new Brita bottle without the initial flushes?
Technically, you could, but I wouldn’t recommend it. Those initial flushes remove fine carbon dust that’s a byproduct of the manufacturing process. While this dust isn’t necessarily harmful, it can affect the taste of your water and defeat the purpose of filtering. Spending five extra minutes on flushes ensures you get the best possible results from day one.

![7 Best Ten Inch Water Filter [2026]](https://waterans.com/wp-content/uploads/2026/06/7-best-ten-inch-water-filter-2026-featured-768x432.jpg)