How to Replace a GE Water Filter: Tutorial
Replacing your GE water filter is usually a quick and simple process that takes just a few minutes. Most GE refrigerators have a filter located either in the grille at the bottom or inside the refrigerator compartment. By following a few basic steps, you can ensure you’re always drinking fresh, clean water from your appliance.
Regularly changing your water filter is important for maintaining the quality of your drinking water and the efficiency of your refrigerator. A clogged filter can lead to slower water flow and may even affect the taste of your water. We found that many GE models make this task straightforward for homeowners to manage themselves.
- Locate your GE water filter.
- Turn off the water supply if your model requires it.
- Remove the old filter.
- Install the new filter.
- Run water to flush the system.
Let’s walk through exactly how to replace your GE water filter step by step to get your fridge back to optimal performance.
Updating Your GE Refrigerator Water Filter: A Simple Guide
Replacing your GE water filter is a straightforward task. You can typically do it in under 15 minutes. This guide will walk you through each step. We’ll help you ensure your refrigerator delivers crisp, clean water.
Locating Your GE Water Filter
The first step is finding the filter. GE places them in a couple of common spots. Knowing where to look makes the process much faster.
Filter in the Refrigerator Compartment
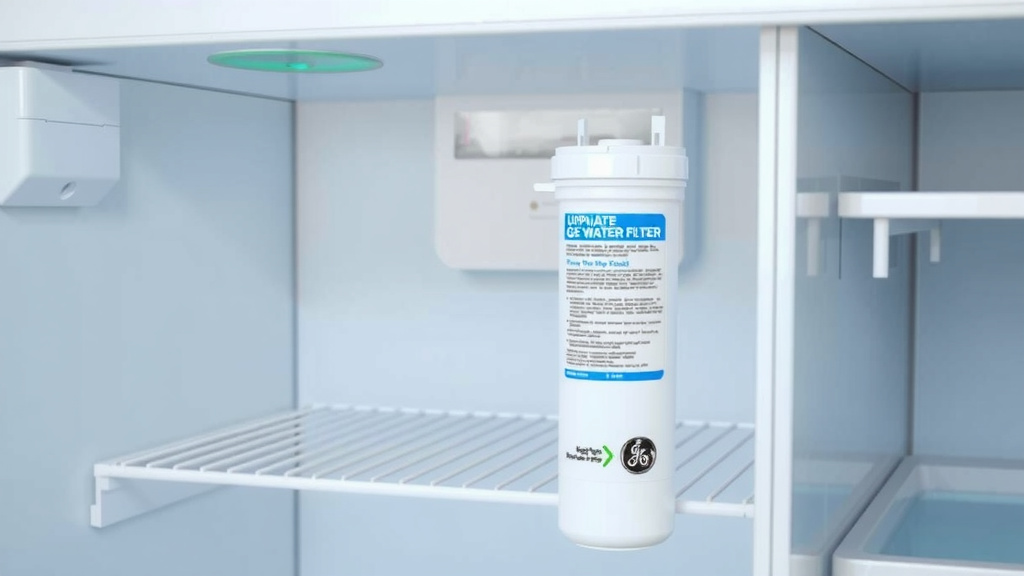
Many GE models have the filter located inside the fridge. You’ll usually find it in the upper right-hand corner. Sometimes, it’s behind a small cover. You might need to remove a shelf or crisper drawer to access it.
Filter in the Base Grille
Other GE refrigerators feature a filter in the bottom grille. This is the vent area at the very bottom of the fridge. The filter often twists or pulls straight out from this location. Check your user manual if you’re unsure.
Preparing to Replace the Filter
Before you start pulling things out, a little preparation goes a long way. These steps ensure a smooth replacement.
Gather Your Supplies
You’ll need your new GE water filter. Make sure it’s the correct model for your refrigerator. A clean towel or rag is also a good idea. This helps catch any drips.
Turn Off the Water Supply (If Necessary)
Some GE models do not require you to turn off the water supply. However, for others, it’s a recommended step. Check your refrigerator’s manual. If you do need to turn off the water, locate the shut-off valve. It’s usually behind the refrigerator or under the sink. Turn the valve clockwise to stop the water flow.
Removing the Old GE Water Filter
Taking out the old filter is usually quite simple. You shouldn’t need any special tools for this. We found most removal methods are designed for quick changes.
Twist and Pull Method
For many GE models, the filter twists counter-clockwise. You might need to push it in slightly first. Once it’s loose, pull it straight out. A bit of water might drip out, so have your towel ready.
Push Button or Release Tab Method
Some GE refrigerators use a push-button release. You’ll see a small button or tab near the filter housing. Press this button, and the filter should pop out slightly. Then, you can pull it the rest of the way. Always refer to your owner’s manual if you encounter resistance.
Installing the New GE Water Filter
Installing the new filter is essentially the reverse of removal. It’s designed to click into place securely.
Align and Insert
Line up the new filter with the housing. Make sure it’s oriented correctly. Most filters have an arrow or indicator. Push the filter firmly into the housing until it stops.
Twist to Lock
Once inserted, twist the new filter clockwise. You should feel it lock into place. GE filters are designed to seal tightly. A secure lock prevents leaks. If your model has a release button, it should click back into place automatically.
Post-Installation Steps and Flushing
After the new filter is in, there are a couple of important final steps. These ensure your water system is working correctly.
Turn Water Supply Back On (If Turned Off)
If you turned off the water supply earlier, turn it back on now. Rotate the valve counter-clockwise. Check for any immediate leaks around the filter area.
Flush the New Filter
This is a critical step often overlooked. You need to flush the new filter. Running water through it removes any air or loose particles. Your refrigerator’s manual will specify the amount of water. Typically, it’s about 2-4 gallons. Dispense water into a large pitcher or sink. You might notice the water is cloudy at first. This is normal and will clear up as you flush.
Checklist for a Smooth Filter Change
Here’s a quick checklist to ensure you haven’t missed anything:
- Verified new filter is the correct GE model.
- Located the old filter in your refrigerator.
- Turned off the water supply if your manual advised it.
- Removed the old filter completely.
- Inserted and locked the new filter securely.
- Flushed the new filter with sufficient water.
When to Replace Your GE Water Filter
Most GE refrigerators have an indicator light that alerts you. This light usually turns red or yellow. Many experts recommend replacing the filter every six months. This timeframe ensures optimal performance. You might need to replace it sooner if you notice reduced water flow. Changes in water taste are also a sign. Following these guidelines helps maintain water quality (Cleveland Clinic).
Conclusion
You’ve successfully learned how to replace your GE water filter. It’s a simple maintenance task that keeps your water tasting great. Remember to locate the filter, prepare your supplies, and follow the removal and installation steps carefully. Don’t forget to flush the new filter afterward. This ensures you’re drinking the freshest water possible. Making this change every six months or when prompted will keep your refrigerator running efficiently. You’re now ready to enjoy clean, purified water straight from your fridge.
Frequently Asked Questions
How do I know which GE water filter to buy?
Always check your refrigerator’s model number. You can usually find this on a sticker inside the fridge compartment or in your owner’s manual. GE offers different filter series, so matching the model number is key to ensuring compatibility and proper fit.
What if my GE water filter won’t twist out?
If the filter is stuck, ensure you’re turning it the correct direction (usually counter-clockwise). Sometimes, a gentle but firm push inward before twisting can help break a seal. If it’s still difficult, double-check your refrigerator’s manual for specific instructions or contact GE support.
Is it okay to use a non-GE brand water filter?
While other brands might claim compatibility, it’s generally best to use genuine GE filters. Using a GE-certified filter ensures it meets the manufacturer’s specifications for performance and safety. Non-GE filters may not fit correctly or filter as effectively, potentially voiding your warranty.
Why is the water cloudy after installing a new filter?
Cloudy water is usually caused by trapped air bubbles or fine carbon particles from the new filter. This is normal and harmless. Simply continue flushing the system by dispensing water until the cloudiness disappears, which typically takes a few gallons.
How often should I really replace my GE refrigerator water filter?
GE typically recommends replacing the filter every six months. However, you should also replace it if your refrigerator’s filter indicator light turns on, or if you notice a decrease in water flow or a change in water taste. Usage patterns can affect how quickly a filter needs replacement.
![10 Best Reverse Osmosis Water Filter [2026]](https://waterans.com/wp-content/uploads/2026/06/10-best-reverse-osmosis-water-filter-2026-featured-768x432.jpg)
![10 Best Home Water Filter System [2026]](https://waterans.com/wp-content/uploads/2026/07/10-best-home-water-filter-system-2026-featured-768x432.jpg)